Showing posts with label baking. Show all posts

Friday, December 21, 2012

Peppermint Brownie Trifle

My mom needed to bring a dessert for a Christmas party at the job she just started.  Since I've had great success using my baking skills to buy friends at work, I volunteered to whip up a Christmas-y concoction.


First, I baked baked two batches of brownies.  I accidentally bought the cheap value mix that is only supposed to make an 8x8 pan, but I just spread it out really thin and made it take up a whole 13x9 pan.  This was only the first of several errors that could have potentially ruined things, but I managed to make them work somehow.  Once they were cool, I cut them up into bite sized pieces.


Then I made some pudding Cool Whip stuff.  It's supposed to be a semi-lite frosting recipe, but it always comes out too goopy to actually frost things with.  However, it makes fantastic trifle filling.  I intended to make this with a box of peppermint instant pudding that I could've sworn that I bought, but apparently I didn't.  I made another trip to Meijer only to discover that they were sold out of the pudding.  What a waste.  Instead, I improvised.  I used vanilla pudding and added red food coloring and peppermint extract.  It ended up working out quite nicely.


Then I whipped up another batch of the pudding Cool Whip stuff, but I only added green food coloring to this one.  I was afraid that too much peppermint would make it crazy since I'd also added some to the brownie batter.


Then I chopped up some Oreos.  The red ones are just regular winter ones.  The green ones are mint flavored.


My mom picked out a pretty glass bowl and I started layering things.  First I put a layer of brownies on the bottom.  Next, I spread some of the green pudding.  I added some more brownies and some red peppermint pudding.  In the middle, I added a layer of mint Oreo bits.  I kept layering until I ran out of stuff.


On the top, I sprinkled the rest of the chopped Oreos for a pretty red and green topping.


A side view.  It was so tasty.  I know I say that about everything I make, but this was crazy good.  Some of my mom's co-workers demanded the recipe.  I made a similar trifle in the fall using pumpkin spice pudding and spice cake, so you can use whatever flavor combinations make you happy.  Here's the peppermint brownie recipe:


2 packages brownie mix, cooked according to the directions on the box (or you can use any kind of cake mix)
2 4-serving packages of instant vanilla pudding (or whatever flavor you want the frosting to be)
1/4 cup peppermint flavored creamer
1/2 tsp peppermint extract
1 3/4 cup milk, divided
16 oz. Cool Whip, divided
8 oz. cream cheese, softened and divided
2/3 cup powdered sugar, divided
red food coloring
green food coloring
12 mint Oreos
4 red Winter Oreos
1.  Cut the brownies up into small squares.
2.  In a large mixing bowl, blend 4 oz. cream cheese and 1/3 cup powdered sugar together.  Add one package of pudding mix.  Stir in the peppermint creamer, peppermint extract, and 3/4 cup milk until the pudding mix is dissolved.  Add red food coloring and blend with the mixer on low until it starts to thicken.  Fold in 8 oz. of the Cool Whip.  Set aside.
3.  Mix remaining cream cheese and powdered sugar.  Add the second package of pudding mix.  Stir in one cup of milk until the pudding mix is dissolved.  Add green food coloring and blend with the mixer on low until it starts to thicken.  Fold in remaining 8 oz. Cool Whip.
4.  Chop Oreos and place into separate bowls.
5.  Place a layer of brownie pieces on the bottom of a large bowl.  Cover with a thin layer of the green pudding mixture.
6.  Place another layer of brownie pieces on top of the pudding and cover with a layer of the red pudding mixture.  Sprinkle some of the mint Oreo pieces on top.
7.  Continue layering until all of the brownies have been used.  Make sure there is enough pudding to completely cover the top of the trifle.  Sprinkle with red Oreo pieces and remaining mint ones.
8.  Chill for at least 2 hours before serving.

Tuesday, December 11, 2012

Peppermint Poke Cake

We all know that I love Pinterest recipes, and for good reason.  Now that it's December, it's time for me to switch from pumpkin to peppermint as my baking obsession.  I needed to make a dessert for a meeting at our house tonight, and I turned to this recipe I'd found for Better Than Christmas Cake.  It was super easy and super delicious.  The only problem was that it had to refrigerate for 4-6 hours before it was served, so I had to make it yesterday and then wait more than 24 hours to taste its peperminty goodness.  It was pure torture, but so very worth it.

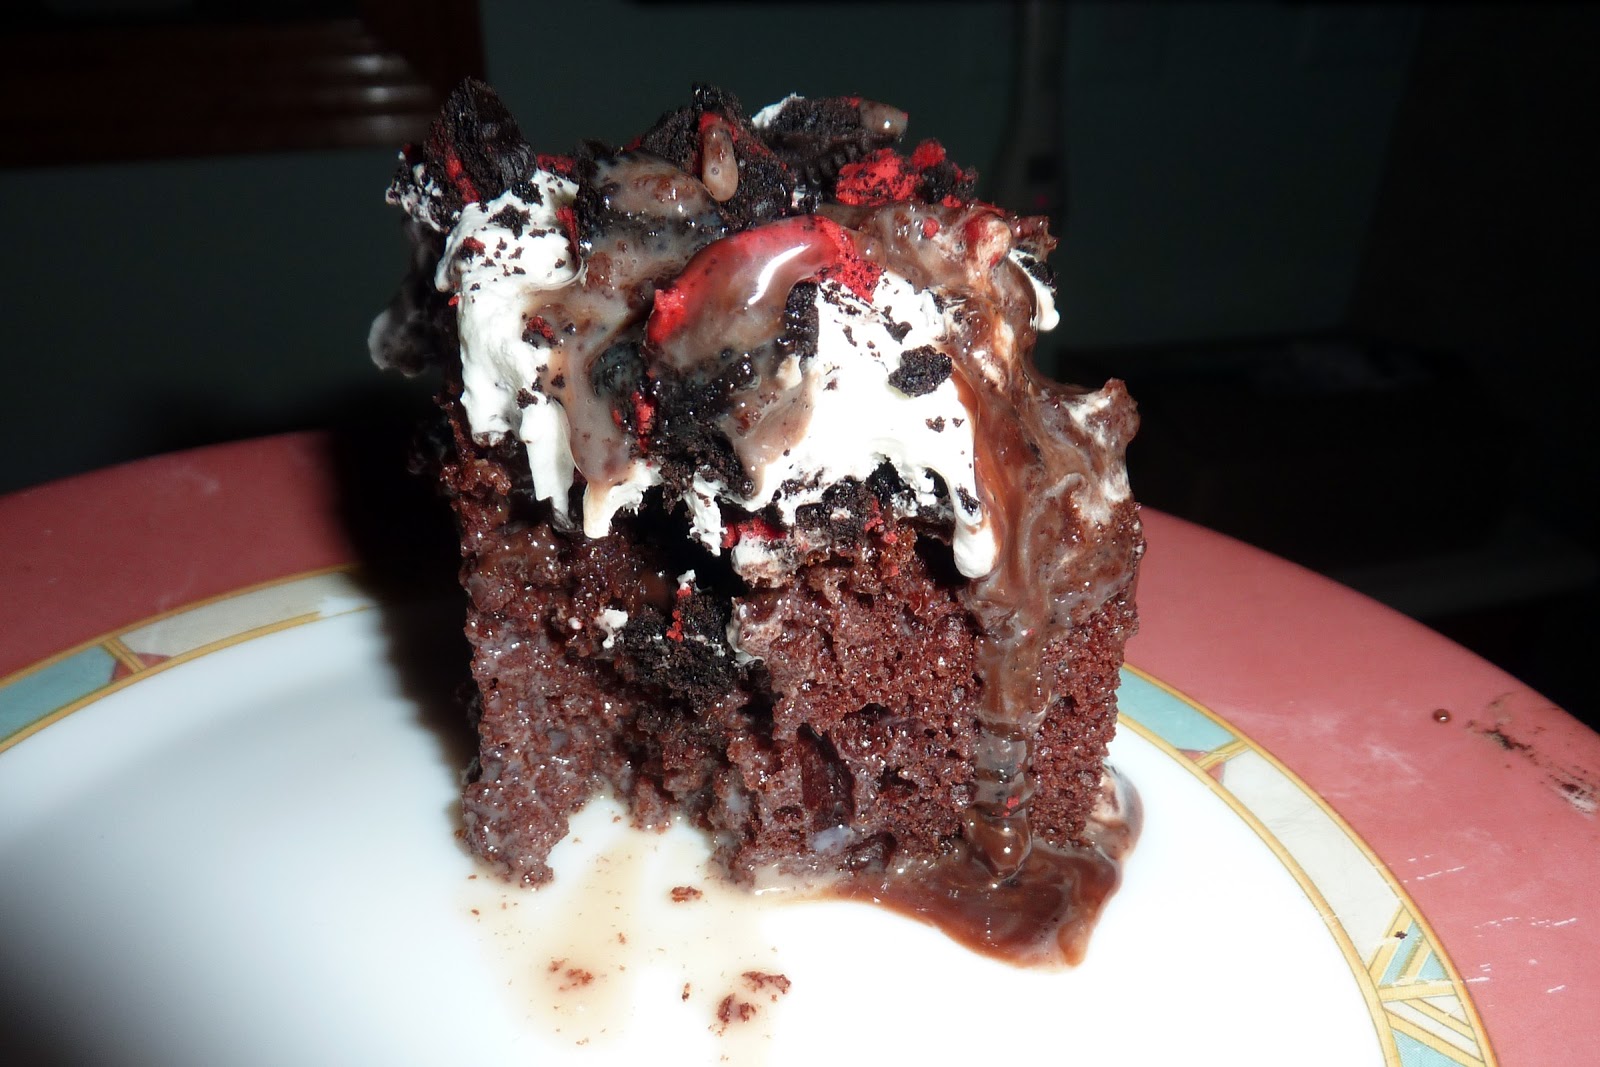
I started by baking a plain old Devil's Food cake mix.  I doctored it up by adding a bit of peppermint extract to the batter, because let's face it: you can never have too much peppermint.  Once it had cooled, I used a wooden meat masher handle (does that thing have a technical name?) to poke a bunch of holes all over the cake.  I may have also sampled some of the crumbs that got stuck to said handle.  They were tasty.


Then I whisked together some sweetened condensed milk (ew) and York peppermint patty creamer and poured it over the cake.  York peppermint patty creamer is almost enough to make me wish I liked coffee.  I'm strongly considering adding it to my hot chocolate next time I make it.  We have a gigantic bottle now and nobody in our house drinks flavored cream.  Or I could just make another batch of this.


The next layer was made up of a jar of hot fudge sundae topping mixed with a bit more of the peppermint creamer and poured on top of the cake again.  This picture looks much tastier than the one above which sort of looks like the cake was eaten by mold.  I assure you that it was not.


I was actually supposed to mix a cup of chopped Oreos in with the chocolate, but I forgot.  Instead, I chopped them and sprinkled them on top.  This made it a lot harder to spread the Cool Whip top layer without picking up a bunch of crumbs, but I persevered.


Then I chopped another cup full of Oreos (the red winter double stuffed kind) and sprinkled them on top of the Cool Whip.  Perfection.  All I had to do was while away the hours waiting until it could be served.


The wait was so worth it.  It was gooey and pepperminty and sweet and chocolatey and everything you could ever want in a dessert.  Well, almost.  I also enjoy peanut butter, caramel, and pumpkin pie spices, among many other things, but you get the idea.


Here was my version of the recipe:

1 box Duncan Hines Devil's Food cake mix, prepared
1/4 tsp peppermint extract
1 1/4 cup York Peppermint Patty dairy creamer, divided
14 oz. can sweetened condensed milk
1 jar Kroger hot fudge sundae topping
2 cups (12 cookies) chopped double stuffed holiday Oreos, divided
8 oz. fat free Cool Whip

1.  Make the cake mix according to the directions on the box and add the peppermint extract to the batter.  Bake according to the directions and allow to cool completely.
2.  Get a straight, round kitchen utensil (ideally a wooden spoon) and poke a bunch of holes all over the cake.  Have some fun.  This is the best step.
3.  Mix 1 cup of the creamer with the can of condensed milk and pour over the cake as evenly as possible.
4.  Warm the hot fudge topping in the microwave for 30 seconds and then mix together with the remaining 1/4 cup of the creamer.  Stir in 1 cup of the chopped Oreos.  Pour this on top of the cake too.
5.  Spread the Cool Whip over the cake in a smooth, even layer.
6.  Sprinkle the remaining Oreos over the top so that they look pretty.
7.  Cover and refrigerate for at least 4 hours so that the delicious ingredients have time to soak into the cake.

Makes 24 servings, 301 calories each according to my MyFitnessPal recipe calculator.

Saturday, September 15, 2012

Forays into Baking...

You know, for an educated, modern, extraordinarily independent woman, I'd make an excellent housewife.  As long as I could hire a maid to do the cleaning.  Ok, so basically I'd just be a really good stay at home cook who read a lot of books and took long bike rides to restaurants for lunch before coming home and whipping up a fabulous dessert/dinner.  But I would be good at it.

Since I didn't have a subbing job today, I was left with a lot of free time.  Plus, it was Friday, so the library was closed.  This is usually not something that ends well.  We've had a couple of graham cracker pie crusts in our pantry for ages, and this afternoon, I felt them calling out to me to be made into a pie.  I was going to make one of my delicious s'more pies, but we didn't have any chocolate pudding.  I had some vanilla, but vanilla-marshmallow pie just didn't sound that good.  That's when I got the brilliant idea to make a fruit pie.  I've never made a real pie before, so this was going to be just the adventure I needed to spice up my Friday afternoon.

I had bought a package of golden raspberries earlier in the week that I wasn't hugely fond of, so I knew right away that those were going to be a part of the pie.  However, that was the only fruit in our entire house, and I knew I needed some more.  I hopped on my bike (this has recently become a huge component of my fitness plan) and headed off to the local Meijer.  I had intended to get some blueberries and apples, but blueberries were way expensive, so I just settled for two large apples.  And store brand Oreos.  Those weren't for the pie, but they were on sale and I've got something great planned for them in the future.

When I got home, I got right to work on my pie.  I cobbled the recipe together (as usual) from a few hastily googled recipes and got to work.  First, I cored and sliced the apples I had bought (one gala and one golden delicious).  In all my life, I've never actually used the apple corer/slicer thingy.  I'm a firm believer in just biting into apples.  It appeals to the animal part of my brain.  Then I sliced each of the large apple slices into three thinner slices and then cut those into thirds lengthwise.

I don't know what kind of knife that is, but it makes me feel like Aladdin, so I like it.
Once the apple slicing (by far the hardest part of the process) was completed, I mixed the flour, sugar, and cinnamon together in a bowl.  Then I stirred the apples in until they were evenly coated.  Since I was using a graham cracker crust that didn't really need to be baked, I was afraid that if I put the fruit filling in cold, the crust would burn before the pie was fully baked.  I also decided that I wanted my pie to be a little less dry inside, so I tossed the whole mixture into a saucepan and added a 1/2 cup of water.  I simmered it for a bit and then added another 1/2 cup of water.

Once I was satisfied that the apples were warmed up enough, I spooned half of the mixture into the bottom of the pie pan.  Then I spread the golden raspberries over it and poured the rest of the apples on top.  Then I got to work on the crumble topping.  This was by far the tastiest part of the pie.  In fact, I'm having a hard time preventing myself from standing at the counter and eating the topping off of the remaining third of the pie.

The crumble topping has flour, brown sugar, cinnamon, and nutmeg.  I used a potato masher to mix in 1/4 cup of unmelted butter.  This requires a surprising amount of effort.  Once I'd gotten it evenly mixed so that it formed the perfect crumbles, I sprinkled it over the top of the fruit filling.  I had more than enough to make a nice, even coating.  After that, it was into the oven for 35 agonizing minutes as I sat at my computer in the kitchen and reveled in the aroma of baking cinnamon and apples.

Smells like heaven.  Tastes even better.
The pie turned out amazing, if I do say so myself.  Apple-golden raspberry pie isn't as glorified as plain old apple pie, but it should be.  It was not nearly as complicated as I thought it would be.  It turns out that the saying "easy as pie" is true after all.  I managed to let it cool for a whole ten minutes before I cut myself a slice.  I'm finally starting to get a hang of this not-burning-my-tongue thing.  Almost.  It was delicious.  The golden raspberries were delightful mixed in with the apples and the crumble topping was heavenly.  I want to eat all of the pie.  All of it.  And I'm not usually a huge pie fan.  I must make another one soon.  We've got another pie crust left, and there are so many different kinds of fruits to try in it.

Here's my recipe:

3/4 cup flour, divided
1/2 cup sugar
1 tsp cinnamon, divided
1 large gala apple
1 large golden delicious apple
1 cup water
5 oz golden raspberries
1 graham cracker pie crust
1/2 cup packed brown sugar
1/4 tsp nutmeg
1/4 cup butter, slightly softened

1.  In a medium bowl, mix 1/4 cup of the flour, the sugar, and 1/2 tsp of the cinnamon.  Set aside.
2.  Slice the apples into small, bite-sized pieces.
3.  Mix the apples into the dry mixture until evenly coated.
4.  Transfer mixture to medium sauce pan.  Add water 1/2 cup at a time.  Simmer on low for 5-10 minutes, stirring constantly to prevent burning.
5.  Spoon half of the apple mixture into the bottom of the pre-made pie crust.  Spread raspberries evenly over the mixture.  Pour the rest of the apple mixture on top of the raspberries.  The fruit filling should be mounded over the top of the pie crust depending on the size of the apples you used.
6.  Mix the remaining 1/2 cup flour, brown sugar, 1/2 tsp cinnamon, and 1/4 tsp nutmeg in a small mixing bowl.  Cut in the softened butter (I used a potato masher) until it is evenly mixed and forms loose chunks.
7.  Sprinkle this evenly over the top of the pie, making sure that you cover as much of it as possible.
8.  Place pie onto a baking sheet in case the fruit filling bubbles over.  Bake at 375 F (or 350 F convection) for 35 minutes.  Remove, cool, and enjoy.

Wednesday, September 12, 2012

Disney Cooking...

One of my great loves in life has always been Disney.  The movies, the songs, the parks, you name it and I probably love it.  Except for Sleeping Beauty.  I don't like her.  Don't get me started on that.  Between three different Disney internships, I lived right next to Disney World for almost two years.  One of my favorite perks of living at the greatest collection of theme parks and resorts in the entire world?  The food.  Oh, yes, the delicious, decadent food.  Food so good that I would visit the parks or hotels alone just to eat it if I couldn't find anyone to accompany me.

Ooh la la!
My favorite restaurant by far is Pioneer Hall.  It's the home to the Hoop Dee Doo Revue.  I've been pretty much obsessed with this dinner show since I was a child.  My family used to vacation there almost every year and we'd always have dinner at the Hoop once.  The show's not for everyone--you have to have an appreciation of cheesy humor, slapstick comedy, and bear jokes to really love it (or just indulge in the bottomless sangria that comes with your meal).  As luck would have it, I happen to particularly enjoy that type of humor.  The show has recently undergone some changes and it's not quite what it used to be, but it's still worth checking out.  At the end of every show (this part remains unchanged), they select a few audience volunteers.  One of them is always a young woman.  For as long as I can remember, I've been dying to be that volunteer.  She gets to dress up as a can can dancer and tell a bear joke.  What else could a girl want?  I finally after years of silent hoping got a chance to do just that last fall, thus making one of my great life dreams come true.  Don't I look great?  Side note: it was really awkward because I was wearing a short dress and I'm pretty sure that the people in the front row could see straight up it.  But I digress.  This was about food.

One of my favorite items on the Hoop's menu is the cornbread that is served when you're seated.  I love cornbread.  It's delicious.  Theirs is no exception.  A few weeks ago, I was trolling Pinterest and I found a link to a site that lists tons and tons of Disney World recipes.  One of them was for Hoop Dee Doo Cornbread.  I jumped out of my chair and almost forgot to repin it in my excitement.  Luckily, I got a hold of myself.  I just needed to buy corn meal.  Is corn meal used for anything else?  I ask because I have a large container of it now and the only thing I've ever used corn meal for in my life was making this batch of cornbread.  Not that making several more pans of it would be an issue or anything...  I'm just curious.

Anyway, despite my love of cornbread, I've never made it before.  I bake a lot of desserts and am developing quite a talent for casseroles, but cornbread has never crossed my mind as something to bake.  I have no idea why.  After reading the recipe over, I determined that cornbread is basically cake with some corn meal in it.  I guess that explains why I like it so much.  My sister and I quickly whipped up a batch and tossed it in the oven.  It's super easy; if you can measure and stir, it'd be pretty hard to mess this up.  This was our result:

It tastes like Disney World!
The cornbread was delicious, as expected.  It's been almost a year since I ate at the Hoop, so I honestly can't vouch for the fact that it tastes just like it's supposed to, but if I closed my eyes and imagined myself in a big, rustic dining hall with some banjo music, I could picture it being right at home.  Despite my earlier musings, I fully expect to use the rest of my corn meal making repeated batches of this.  Eat it right out of the oven.  It's heavenly.  The recipe can be found here.  I definitely recommend checking out the other recipes listed on that site.  This is the only one I've tried so far, but I've got a whole list of things I want to cook off of it.

Tuesday, September 4, 2012

TARDIS Cake...

...It's more fattening on the inside.
For my recent birthday, I requested that my cake be decorated like a TARDIS.  This was awkward because I then had to explain what a TARDIS is and print a picture of it so my mom knew what it was supposed to look like.  Even more fun ensued on my birthday when I tried to explain it to my dad.  He chooses to not understand such things on principle.

Anyway, after making my TARDIS request, I started thinking about the cake that was to come.  I decided that in order to live up to TARDIS standards, there would have to be a bit more to the cake than just a box mix with some dyed frosting.  It would somehow have to be bigger on the inside.  Since our kitchen is not equipped with any Gallifreyan technology, I would have to come up with a creative way to make this happen.

One of my great dessert obsessions is cookie dough.  I'm assuming that this applies to a lot of people.  Thanks to Pinterest, I came across a recipe for egg-less cookie dough a while back.  This seemed like the perfect opportunity to put it to good use.  My sister and I immediately set out to create the perfect bigger/more fattening on the inside cake.  (Yes, I helped make my own birthday cake.  I really like baking things.  I did at least claim birthday privileges and make her clean everything up.)

Do you have any idea how hard it was to not just eat these straight up?
We made the cookie dough and then rolled it into small balls and put them in the freezer on a cookie sheet for an hour.  Then we made a chocolate cake mix and poured it into the baking pan.  Right before putting it in the oven, we dropped the cookie dough balls on top of the batter.  We had enough cookie dough to almost completely cover the top of the cake.  We baked the cake according to the directions on the box, but had to add a few extra minutes (probably because of the fact that the cookie dough was frozen).  The cookie dough bits sank to the bottom of the pan and remained in their delicious, uncooked glory.  We flipped the cake upside down out of the baking pan, which perfectly positioned the cookie dough at the top right underneath the frosting, thus bringing together my two favorite parts of the cake together in harmony.

The hardest part of the cake process was trying to find food coloring that would dye the cream cheese frosting a proper TARDIS blue.  The regular liquid food coloring just doesn't do the trick.  It never did get quite right, but there's only so much you can do.  Color aside, the cake was delightful.

Look at that delectable layer of cookie dough.  My mouth is watering just thinking about it.
Here's the edible cookie dough recipe:

1 cup butter, softened
3/4 cup sugar
3/4 cup brown sugar
4 tbsp milk
1 tbsp vanilla
2 1/2 cups flour
1/4 tsp salt
1/4 cup mini chocolate chips

1.  Blend the butter and sugars together.  Then add the milk and vanilla.
2.  Mix in the flour and salt until smooth.  Add extra milk if the consistency of the dough is too dry.
3.  Stir in the chocolate chips.
4.  Shape the dough into small balls and place on a wax-lined cookie sheet.
5.  Freeze for at least one hour (or just eat them if you're not planning on using them in a cake).