Friday, December 21, 2012

Peppermint Brownie Trifle

My mom needed to bring a dessert for a Christmas party at the job she just started.  Since I've had great success using my baking skills to buy friends at work, I volunteered to whip up a Christmas-y concoction.


First, I baked baked two batches of brownies.  I accidentally bought the cheap value mix that is only supposed to make an 8x8 pan, but I just spread it out really thin and made it take up a whole 13x9 pan.  This was only the first of several errors that could have potentially ruined things, but I managed to make them work somehow.  Once they were cool, I cut them up into bite sized pieces.


Then I made some pudding Cool Whip stuff.  It's supposed to be a semi-lite frosting recipe, but it always comes out too goopy to actually frost things with.  However, it makes fantastic trifle filling.  I intended to make this with a box of peppermint instant pudding that I could've sworn that I bought, but apparently I didn't.  I made another trip to Meijer only to discover that they were sold out of the pudding.  What a waste.  Instead, I improvised.  I used vanilla pudding and added red food coloring and peppermint extract.  It ended up working out quite nicely.


Then I whipped up another batch of the pudding Cool Whip stuff, but I only added green food coloring to this one.  I was afraid that too much peppermint would make it crazy since I'd also added some to the brownie batter.


Then I chopped up some Oreos.  The red ones are just regular winter ones.  The green ones are mint flavored.


My mom picked out a pretty glass bowl and I started layering things.  First I put a layer of brownies on the bottom.  Next, I spread some of the green pudding.  I added some more brownies and some red peppermint pudding.  In the middle, I added a layer of mint Oreo bits.  I kept layering until I ran out of stuff.


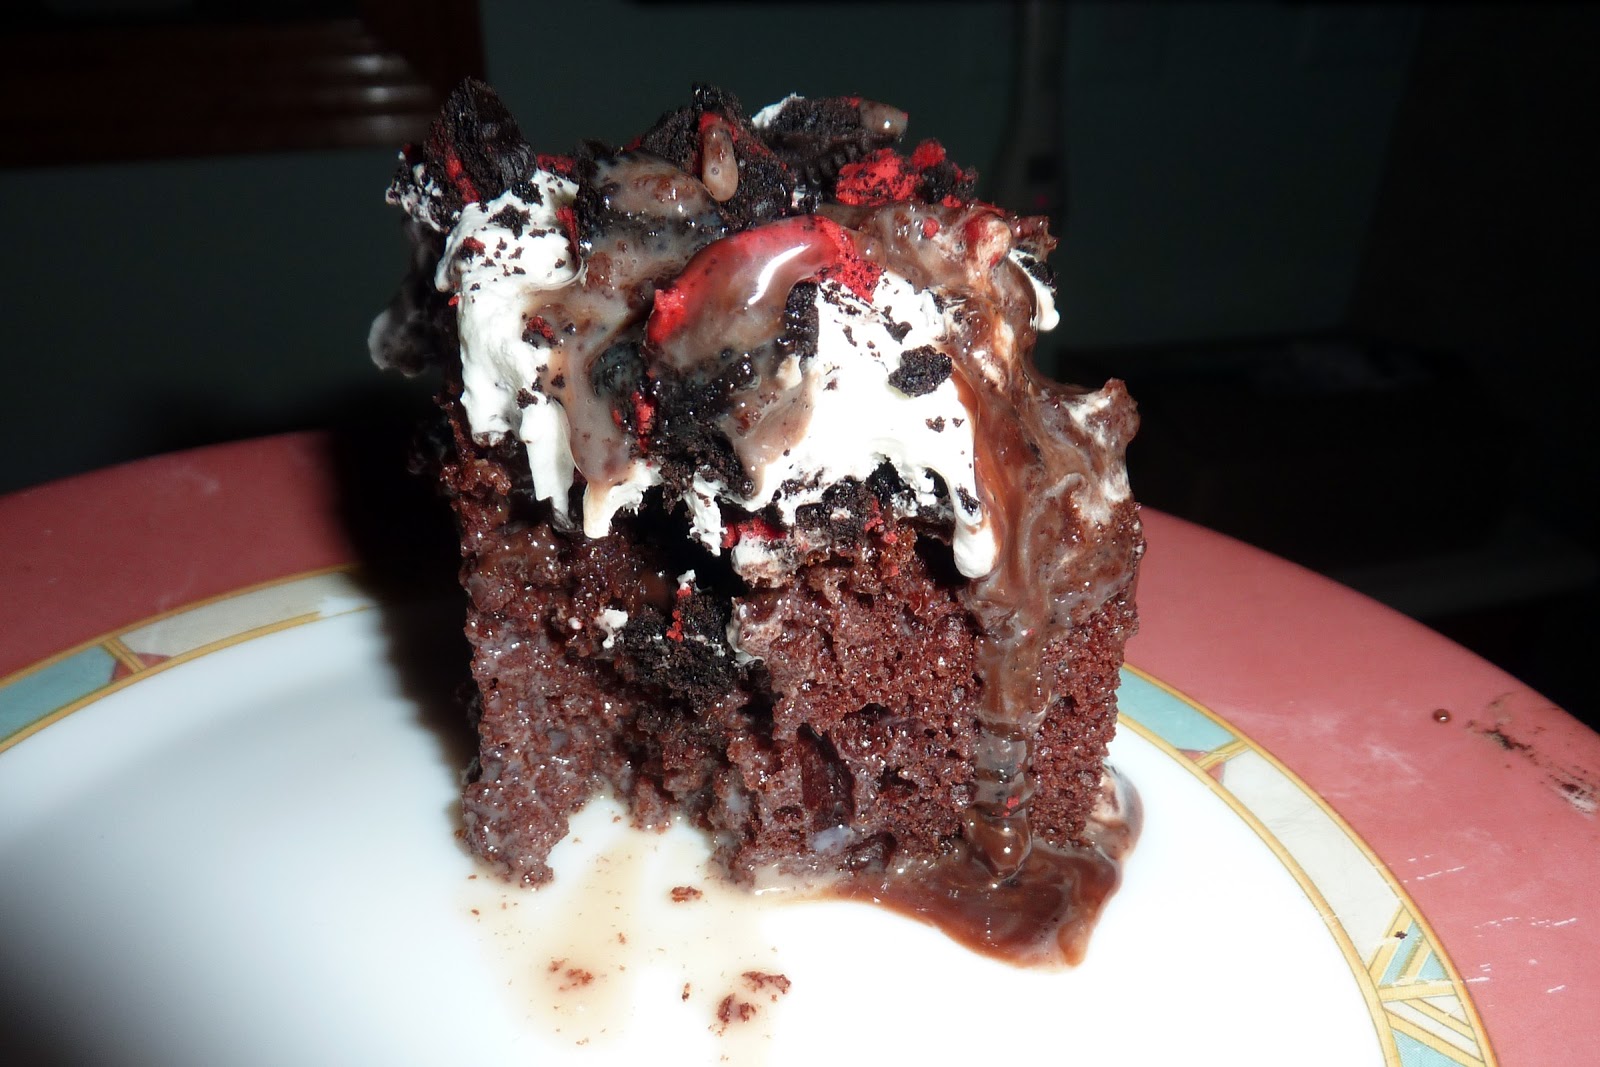
On the top, I sprinkled the rest of the chopped Oreos for a pretty red and green topping.


A side view.  It was so tasty.  I know I say that about everything I make, but this was crazy good.  Some of my mom's co-workers demanded the recipe.  I made a similar trifle in the fall using pumpkin spice pudding and spice cake, so you can use whatever flavor combinations make you happy.  Here's the peppermint brownie recipe:


2 packages brownie mix, cooked according to the directions on the box (or you can use any kind of cake mix)
2 4-serving packages of instant vanilla pudding (or whatever flavor you want the frosting to be)
1/4 cup peppermint flavored creamer
1/2 tsp peppermint extract
1 3/4 cup milk, divided
16 oz. Cool Whip, divided
8 oz. cream cheese, softened and divided
2/3 cup powdered sugar, divided
red food coloring
green food coloring
12 mint Oreos
4 red Winter Oreos
1.  Cut the brownies up into small squares.
2.  In a large mixing bowl, blend 4 oz. cream cheese and 1/3 cup powdered sugar together.  Add one package of pudding mix.  Stir in the peppermint creamer, peppermint extract, and 3/4 cup milk until the pudding mix is dissolved.  Add red food coloring and blend with the mixer on low until it starts to thicken.  Fold in 8 oz. of the Cool Whip.  Set aside.
3.  Mix remaining cream cheese and powdered sugar.  Add the second package of pudding mix.  Stir in one cup of milk until the pudding mix is dissolved.  Add green food coloring and blend with the mixer on low until it starts to thicken.  Fold in remaining 8 oz. Cool Whip.
4.  Chop Oreos and place into separate bowls.
5.  Place a layer of brownie pieces on the bottom of a large bowl.  Cover with a thin layer of the green pudding mixture.
6.  Place another layer of brownie pieces on top of the pudding and cover with a layer of the red pudding mixture.  Sprinkle some of the mint Oreo pieces on top.
7.  Continue layering until all of the brownies have been used.  Make sure there is enough pudding to completely cover the top of the trifle.  Sprinkle with red Oreo pieces and remaining mint ones.
8.  Chill for at least 2 hours before serving.

Sunday, December 16, 2012

Upcycled Cardigan

The ugly Walmart sweater that I cut up into a skirt in the previous post had a red twin.  It just so happened that I had some scraps of red satin-y fabric from another project that I recently finished, so I decided that I would turn the ugly sweater into a cute cardigan with shiny lining along the inside flaps.


I started by cutting straight down the center of the front of the sweater.  I can't promise that the cut was completely straight because I just free-handed it from the point in the v-neck, but I did the best that I could.  I figure nobody will really notice if it's a little off anyway.


Then I cut out two long, narrow pieces of the red satin-y fabric, one for each side of the center of the cardigan.  I pinned them, right sides together, to the front of the cardigan and sewed.


Then I ironed the edges down to hide the hem and sewed another seam along the inside of the satin lining.


And this was the result.  I didn't add any buttons or closures because I didn't feel like dealing with any of that.  The best part is that now that I have the method down, I have an even cooler cardigan project in the works.

Saturday, December 15, 2012

Sweater Skirt Take Two

Actually, the title of this post is a lie.  I made this sweater skirt first.  I just liked the second version a whole lot better.  Plus, this one ended up a lot shorter because it came from a women's v-neck, so I can't really wear it to work.


I started out with this ugly, kind of gross sweater I bought on clearance at Walmart a few years ago.  I was getting rid of it (and its red twin that got chopped up for another project) because it's too big for me now.


I traced out the sides of the skirt and then cut them out.  Just like on the other sweater skirt.  Then I sewed everything together and made a waistband.  Simple as pie.


More plaid flannel!  Yay.  Apparently I'm going through a phase.


Last weekend, I had to help out at a Santa breakfast at the school my  mom used to teach at.  The skirt made a perfect addition to my elf costume.  I literally have no dignity in my life.

Wednesday, December 12, 2012

Disney Ornament Upgrade

While I was working at Disney last year, I came into possession of a cute little Minnie and Mickey ornament.  I love Christmas ornaments and I love Disney stuff, so it was pretty perfect.


The only problem was that the back of it said "2009 Passholder."  Since I clearly was not an annual passholder in 2009, it seemed kind of silly to hang it on the tree like that.  However, all was not lost, because with my trusty bottle of Mod Podge and a compass, I was able to personalize the back of the ornament in such a way that the passholder part was covered up.


Don't let that orange compass fool you.  It's actually completely horrible and borderline useless.  Still, I persevered and got it to draw a circle.  It took me a few tries to get it right because the compass kept moving, but eventually I got a usable round template for the picture.


Then I dug through my file of hundreds of pictures of my family's visit to Disney World last Christmas in search of the perfect Christmas Castle picture.  I didn't find one.  It seems that all of our Castle pictures were taken at night in poor lighting conditions.  After all these years, we really should know better than that.  Anyway, after narrowing it down to a few options, my mom and I selected this one because it seemed the most likely to fit my purposes.  Then all I had to do was figure out how to make the printer do what I wanted, which required a couple of tries.  I figured it out eventually, and used the template I'd cut out to trace a circle around the good part of the picture.


Then I cut it out and glued it to the center of the ornament with Mod Podge.  I set a thermos lid on it and stacked a travel mug on top in order to make it as flat as possible and left it to dry for a couple of hours.  When it had completely dried, I painted the back of the ornament with another coat of Mod Podge to seal the picture in.  I did one more coat and decided that it was secure enough to go on the tree.  This is what the back looks like now.  It's currently our only ornament because we put the lights on the tree and decided to wait for Jeff to come home from MSU before finishing decorating.  So now we have a mostly naked Christmas tree sitting in the family room.  At least it has this one ornament.


Tuesday, December 11, 2012

Peppermint Poke Cake

We all know that I love Pinterest recipes, and for good reason.  Now that it's December, it's time for me to switch from pumpkin to peppermint as my baking obsession.  I needed to make a dessert for a meeting at our house tonight, and I turned to this recipe I'd found for Better Than Christmas Cake.  It was super easy and super delicious.  The only problem was that it had to refrigerate for 4-6 hours before it was served, so I had to make it yesterday and then wait more than 24 hours to taste its peperminty goodness.  It was pure torture, but so very worth it.

I started by baking a plain old Devil's Food cake mix.  I doctored it up by adding a bit of peppermint extract to the batter, because let's face it: you can never have too much peppermint.  Once it had cooled, I used a wooden meat masher handle (does that thing have a technical name?) to poke a bunch of holes all over the cake.  I may have also sampled some of the crumbs that got stuck to said handle.  They were tasty.


Then I whisked together some sweetened condensed milk (ew) and York peppermint patty creamer and poured it over the cake.  York peppermint patty creamer is almost enough to make me wish I liked coffee.  I'm strongly considering adding it to my hot chocolate next time I make it.  We have a gigantic bottle now and nobody in our house drinks flavored cream.  Or I could just make another batch of this.


The next layer was made up of a jar of hot fudge sundae topping mixed with a bit more of the peppermint creamer and poured on top of the cake again.  This picture looks much tastier than the one above which sort of looks like the cake was eaten by mold.  I assure you that it was not.


I was actually supposed to mix a cup of chopped Oreos in with the chocolate, but I forgot.  Instead, I chopped them and sprinkled them on top.  This made it a lot harder to spread the Cool Whip top layer without picking up a bunch of crumbs, but I persevered.


Then I chopped another cup full of Oreos (the red winter double stuffed kind) and sprinkled them on top of the Cool Whip.  Perfection.  All I had to do was while away the hours waiting until it could be served.


The wait was so worth it.  It was gooey and pepperminty and sweet and chocolatey and everything you could ever want in a dessert.  Well, almost.  I also enjoy peanut butter, caramel, and pumpkin pie spices, among many other things, but you get the idea.


Here was my version of the recipe:

1 box Duncan Hines Devil's Food cake mix, prepared
1/4 tsp peppermint extract
1 1/4 cup York Peppermint Patty dairy creamer, divided
14 oz. can sweetened condensed milk
1 jar Kroger hot fudge sundae topping
2 cups (12 cookies) chopped double stuffed holiday Oreos, divided
8 oz. fat free Cool Whip

1.  Make the cake mix according to the directions on the box and add the peppermint extract to the batter.  Bake according to the directions and allow to cool completely.
2.  Get a straight, round kitchen utensil (ideally a wooden spoon) and poke a bunch of holes all over the cake.  Have some fun.  This is the best step.
3.  Mix 1 cup of the creamer with the can of condensed milk and pour over the cake as evenly as possible.
4.  Warm the hot fudge topping in the microwave for 30 seconds and then mix together with the remaining 1/4 cup of the creamer.  Stir in 1 cup of the chopped Oreos.  Pour this on top of the cake too.
5.  Spread the Cool Whip over the cake in a smooth, even layer.
6.  Sprinkle the remaining Oreos over the top so that they look pretty.
7.  Cover and refrigerate for at least 4 hours so that the delicious ingredients have time to soak into the cake.

Makes 24 servings, 301 calories each according to my MyFitnessPal recipe calculator.

Monday, December 10, 2012

Sweater Skirt DIY

Recently, I've become quite the sweater aficionado.  I spend a lot of time convinced that I'm never going to be warm again, and it hasn't even really gotten cold yet.  This doesn't bode well for the rest of winter.  I've also come to realize why animals spend the fall months packing on as much body fat as possible: it's fantastic portable insulation.  Anyway, now that I've shed 40 pounds of it, I've taken to wearing sweaters to keep warm.  I'm kind of in love with sweater dresses, and I've been wanting to refashion a giant Salvo find into one, but I haven't found one that I like yet.  Instead, I settled for this adorable brown argyle one and turned it into a sweater skirt.


This is what the sweater looked like originally.  It was a men's XL that I got for $1.  I love 5 for $5s at Salvo.  They're pretty much my favorite.


I used another skirt that fit me tightly as a template for cutting out the front and back.  Centering it was easy because I lined up its back seam with the middle row of argyle and just trimmed along the edges.  I would recommend taking even more out of it because the first time I wore it, it fit fine in the morning, but by the end of the day, the fabric had stretched out and I had to keep pulling it up.  I fixed it by taking the side seams in again, but I don't have any pictures of that.


Then I put the two pieces of fabric right sides together and sewed side seams.  I started at the bottom and worked toward the top so that the sweater's original hems lined up.  I folded the top parts over and sewed them into a waistband.  That was it.  These modeling pictures seem to indicate that I wear an excessive amount of plaid flannel.  I can't help it; I'm cold all the time!


I liked it so much that I wore it to work the next day with some fleece-lined tights and another sweater.  This is me pushing Penny away so that the picture wouldn't feature her trying to sniff my crotch.


This is what it actually looked like.  I kind of love it.

Sunday, December 9, 2012

Stretchy Paneled Skirt Refashion

I've gotten into a bit of a crafting mood lately, largely thanks to Pinterest, and one of my first projects was to turn a large, ugly red garment into a cute, fitted skirt with black side panels.  I don't really know what the proper description of the original piece of clothing would be.  It sort of looks like a skirt and jacket pair, but they were connected into a sort of dress by a satin lining.  I picked it up at a Salvo thinking that we might be able to use it for a costume for a picture, but it didn't end up working out.  Instead of just throwing it away or re-donating it and wasting the money I had spent, I decided to refashion it into something wearable.


This was the original garment.  Actually, I had already cut the skirt off when this picture was taken, but I arranged it back inside so that I could have a "before" picture of how ugly it really was.


Then I had to slave away with my seam ripper to remove the lining that had attached the skirt to the top portion of the red thingy.  I hate using the seam ripper more than anything.  It's incredibly tedious and usually means that you screwed something up.  Then I took the side seams off of the skirt so that I had two rectangular pieces of fabric.


I was getting rid of this stretchy tank top because it's too big (!) for me now and also I never really liked the way it looked with anything I paired it with.  As you can see, I also forgot to take a "before" shot of this one, but this is what the front originally looked like.  I cut the back of the tank top off using the ribbing as a guide to make it as straight as possible.  Then I folded it in half hot dog style and cut it down the center so that I had two panels.


I free-handed all of the cuts and measurements, so I'm sure a lot of the seams are crooked.  I measured my waist to see how large I should make the skirt and then subtracted an inch since I didn't want to mess with buttons, zippers, or a drawstring.  The natural stretch of the black fabric is enough to hold the skirt up.  Then I trimmed the red cloth using the same fold-it-in-half-and-hope-for-the-best method that I used on the tank top.  If you look closely at the little diagram I made on the sheet of paper, you will see why I shouldn't attempt to do math in the middle of the night.  I had to take in the side seams after I put the skirt together because it was way too big.  It caused the side panels to be slightly narrower than I had originally intended, but everything worked out in the end.


Once everything was cut, I started sewing.  I pinned one side panel to the front section of the skirt and made a straight seam.  I kept the original hems on both garments so that I didn't have to deal with hemming it myself, so I started at the bottom and stitched toward the top of the skirt so that any unevenness caused by the stretchy fabric could be trimmed and hidden by the waistband.  Then I pieced the next panel in, and finally added the back of the skirt.


Because I used straight cuts, when I tried it on, I found that the back of it had an awkward gap that didn't fit me well.  I decided to add a pair of darts onto the front to eat up some of the loose fabric.  I decided where I wanted to place the first one and then used the fold-it-in-half method with the aid of a tape measure to make the lines for the darts symmetrical.


You can sort of see the darts that I traced out in this picture.  I don't own any actual fabric chalk, so I used this awesome purple marker that I love.  I wouldn't recommend doing this.  Then I sewed the darts and finished the skirt by folding down the top and sewing a waistband.


Ta da!  Now I just need somewhere to wear it.  I had been hoping that it could be a work skirt, but it turned out a bit too short for that.

Monday, December 3, 2012

About that NaNoWriMo Thing...

So during November I got this crazy idea to participate in NaNoWriMo.  Actually, I arrived at the decision at around 10 pm on Halloween, and then hovered around my computer for the rest of the night waiting for the stroke of midnight so I could get going.  I spent the month slaving away over my laptop keyboard in an attempt to complete the seemingly impossible task of writing 50,000 words of a novel in just 30 days.  But I did it!

As luck would have it, I had outlined a story a few months ago, so I had a plot and characters and setting ready and waiting to go.  I've never done anything like this before, so I handled it exactly the way anyone who knows me would expect me to.  I printed out my detailed outline, character sketches, location descriptions, and lists of strong action verbs and adjectives, and put them all in a binder with color-coded tabs and a whole bunch of loose leaf paper.  Really, the only downside was the fact that the loose leaf was wide ruled instead of college ruled.  I somehow managed to persevere, though, despite a nearly tragic mishap with a spilled water bottle in my work bag that left the bottoms of the papers slightly crinkly (and nearly claimed the life of my phone).

I'm a month behind on most of my tv shows and my reading of The Hobbit in preparation for watching the movie ground to a halt, but I hit 50,000 words on November 28th, two whole days early.  Then I promptly went out and bought myself a Slurpee.  Because I deserved it.

This story still has a long way to go.  I have close to 50 chapters sketched out and I finished November somewhere in the middle of the 10th.  I don't know if I'll ever get around to finishing it (or if I'll ever actually show it to anyone), but it was nice to get the words that had been rattling around in my head out onto paper. It was also fun to have a sense of purpose for the first time in a while.  Maybe that'll be what keeps me going.  I am, of course, taking a writing break.  I've got a whole load of craft ideas that I've been waiting to work on, and a lot of hours of tv to catch up on.  I like to think that it won't take long for me to get back to writing.